Streamlit Portfolio Template
A portfolio and resume website written entirely in Python. Edit one data file, run one command, and you have a dark-themed, animated personal site with a working contact form.
- state
- healthy
- stage
- evergreen
- status
- open source
- started
- 2026.09
- source
- github ↗
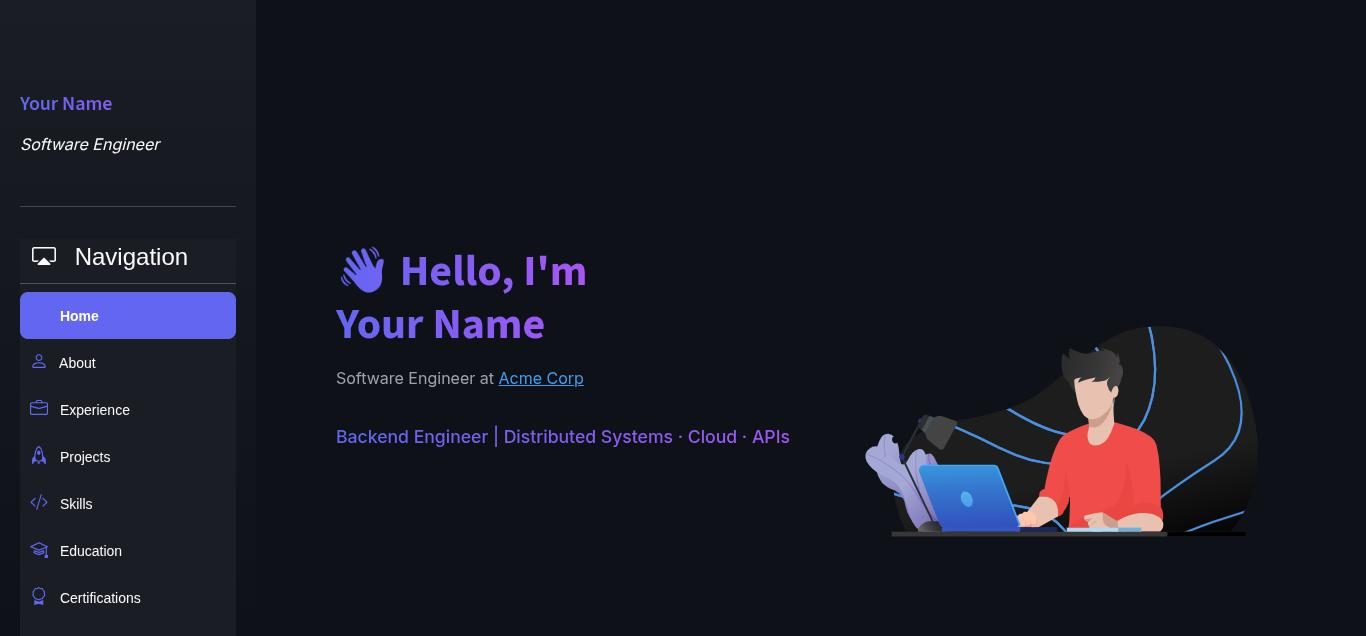
A portfolio site shouldn't require learning a frontend framework. This template builds a complete personal site (hero, experience timeline, projects, skills, education, certifications and a contact form) using only Python and Streamlit.
All the content lives in one file, core/data.py. Change the dictionaries in it and the whole site updates. No
HTML templates to hunt through, no build step.
Source code: github.com/sumit-kumar-03/streamlit-portfolio-template
What you get:
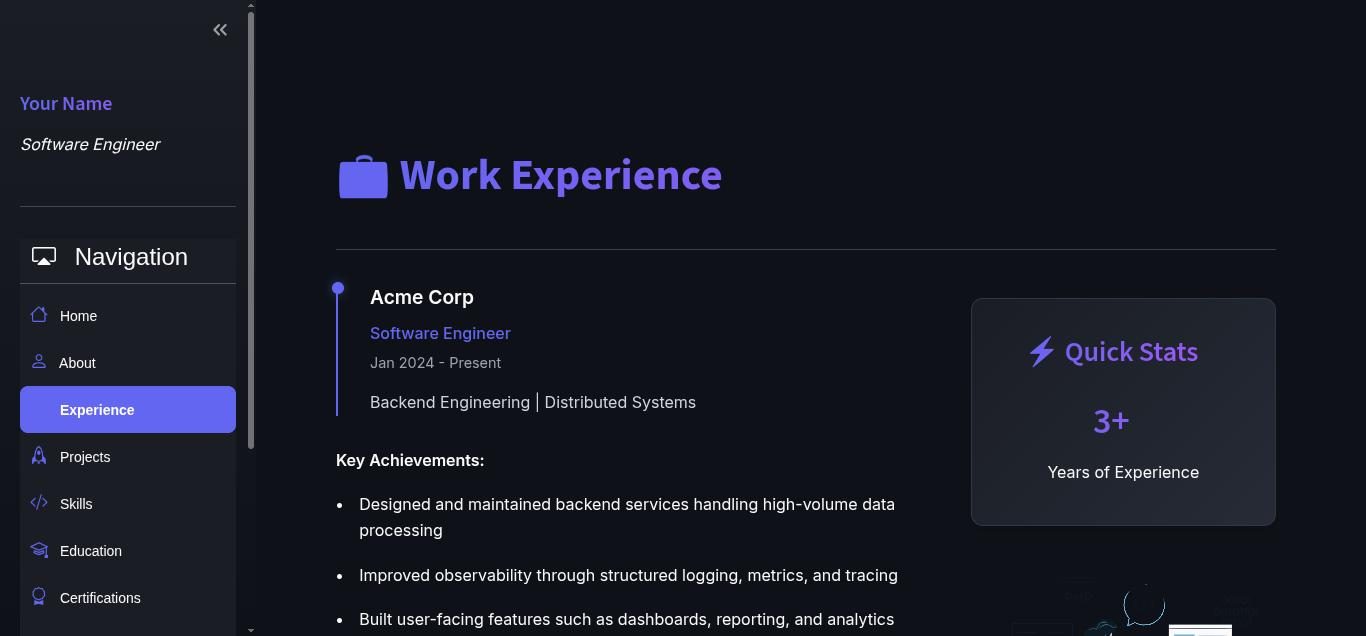
- Eight sections behind a sidebar menu: Home, About, Experience, Projects, Skills, Education, Certifications and Contact.
- A dark theme with gradient headings, hover cards and the Inter font, set through Streamlit's theme plus a small injected stylesheet.
- Lottie animations, lightweight vector animations stored as JSON files, on the hero and section pages.
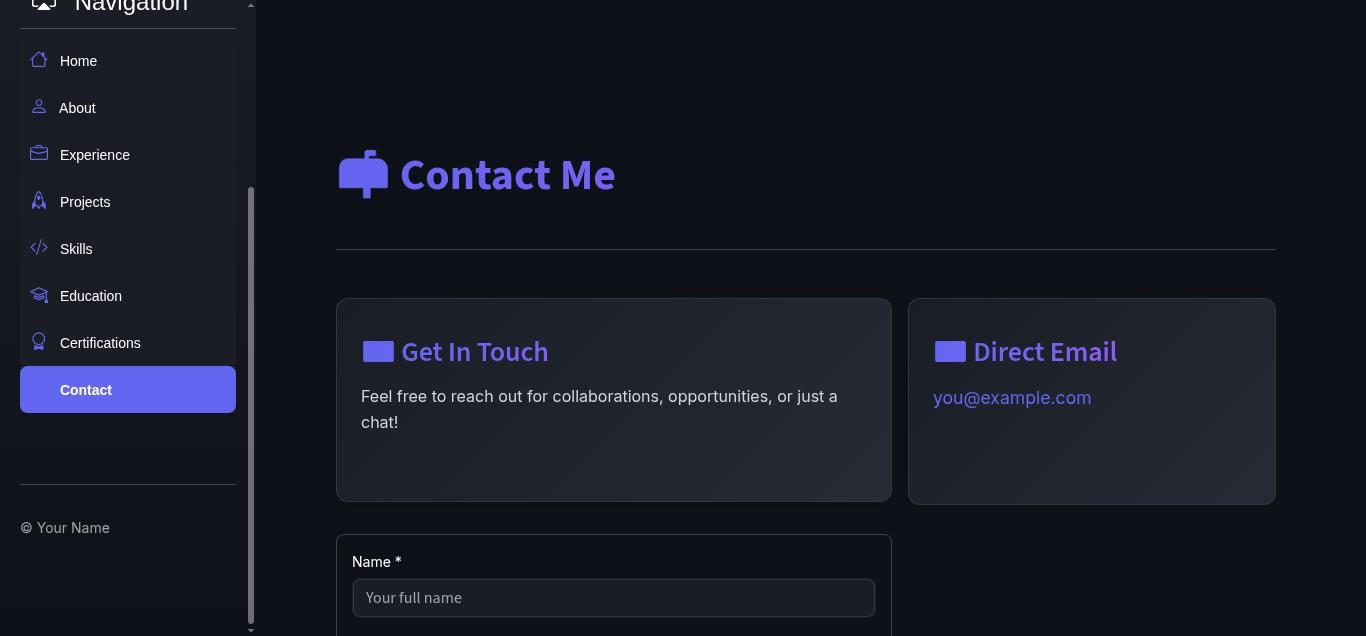
- A contact form that validates input and saves each message to a local file. No email service or database needed.
- Docker two ways: a self-contained image for deploying anywhere, and a Compose setup that mounts your project so saved changes reload automatically.
It started as an earlier version of this very website, which I then generalised into a template with placeholder content.
How it works
Streamlit runs your Python script from top to bottom on every interaction. The template uses that directly: the
sidebar menu returns the selected section name, and app.py renders only that section.
core/data.py ──▶ app.py ──▶ sidebar option_menu ──▶ "Experience"?
 (content)        │                                     │
                  └── core/styles.py (CSS)              ▼
                                            core/components.py
                                            render_work_experience(...)
                                            → st.markdown(HTML card)
| File | Role |
|---|---|
app.py | Page config, SEO meta tags, CSS injection, the sidebar menu, and an if/elif block per section |
core/data.py | All your content: PERSONAL_INFO, SOCIAL_LINKS, WORK_EXPERIENCE, PROJECTS, SKILLS, EDUCATION, CERTIFICATIONS |
core/components.py | render_* functions that turn one piece of data into an HTML card or timeline item |
core/styles.py | A single get_custom_css() string: font import, gradients, cards, badges, responsive rules, animations |
core/enums.py | Loads the Lottie JSON files and holds the hero intro text |
core/local_storage.py | Appends contact-form submissions to submissions/contact_submissions.txt |
.streamlit/config.toml | Theme colours, server port, reload on save, usage stats turned off |
lottiefiles/ | The animation files |
Run it in five minutes
With Python (3.12 recommended):
git clone https://github.com/sumit-kumar-03/streamlit-portfolio-template.git
cd streamlit-portfolio-template
pip install -r requirements.txt
streamlit run app.py              # http://localhost:8501
With Docker, for editing (auto-reload included):
docker compose up --build # http://localhost:8081
Compose mounts the project folder into the container, and runOnSave = true in .streamlit/config.toml makes
Streamlit reload the moment you save a file.
With Docker, for deploying (a self-contained image):
docker build -t portfolio:latest .
docker run -p 8501:8501 portfolio:latest    # http://localhost:8501
Make it yours
- Content: replace the placeholders in
core/data.py. It's plain Python dictionaries and lists, so add or remove entries freely. - Intro text: edit
InfoSectionincore/enums.py. - Resume: drop your PDF at
cv/resume.pdf, then uncomment the Resume button inrender_hero_section()incore/components.py. - Colours: change
primaryColor,backgroundColorand the others in.streamlit/config.toml, and the gradient stops incore/styles.py. - Animations: download any animation as JSON from lottiefiles.com, put it in
lottiefiles/, and point aGraphicentry incore/enums.pyat it.
Build it yourself, step by step
This section rebuilds the template's core ideas from scratch, so you understand each piece and can take it further.
1. Set up
mkdir my-portfolio && cd my-portfolio
python3 -m venv .venv && source .venv/bin/activate
pip install streamlit streamlit-option-menu streamlit-lottie
mkdir core lottiefiles
touch core/__init__.py
2. Separate content from layout
Put everything a visitor reads into core/data.py. Your layout code then never contains personal text, and updating
the site means editing data, not markup:
PERSONAL_INFO = {
    "name": "Your Name",
    "title": "Software Engineer",
    "tagline": "Backend | Distributed Systems · Cloud · APIs",
    "bio": "A short paragraph about you.",
    "email": "you@example.com",
    "location": "City, Country",
}

PROJECTS = [
    {
        "name": "Sample Project",
        "description": "What it does and why.",
        "tech_stack": ["Python", "FastAPI"],
        "highlights": ["Key result"],
        "github": "https://github.com/you/project",
        "demo": "",
    },
]
3. Page config and sidebar navigation
st.set_page_config must be the first Streamlit call. option_menu gives a styled menu with icons and returns
the selected label:
import streamlit as st
from streamlit_option_menu import option_menu
from core.data import PERSONAL_INFO, PROJECTS

st.set_page_config(page_title=f"{PERSONAL_INFO['name']} - Portfolio", page_icon="👤", layout="wide")

with st.sidebar:
    st.markdown(f"## {PERSONAL_INFO['name']}")
    selected = option_menu(
        menu_title="Navigation",
        options=["Home", "Projects", "Contact"],
        icons=["house", "rocket", "envelope"],     # Bootstrap icon names
        default_index=0,
    )

if selected == "Home":
    ...
elif selected == "Projects":
    ...
4. Render data with small component functions
Each render_* function takes one item from data.py and draws it. Streamlit's own widgets can't do custom card
layouts, so the template writes HTML with st.markdown(..., unsafe_allow_html=True) and styles it with CSS classes:
def render_project_card(project):
    st.markdown(f"""
    <div class="project-card">
        <div class="project-title">{project['name']}</div>
        <p>{project['description']}</p>
    </div>
    """, unsafe_allow_html=True)

    for highlight in project.get("highlights", []):
        st.markdown(f"- {highlight}")

    badges = " ".join(f'<span class="tech-badge">{t}</span>' for t in project.get("tech_stack", []))
    st.markdown(badges, unsafe_allow_html=True)

    if project.get("github"):
        st.markdown(f"[GitHub]({project['github']})")
Then the Projects section is just a loop: for p in PROJECTS: render_project_card(p).
unsafe_allow_html is fine here because the HTML comes from your own data file. Never pass visitor input through it.
5. Style it
Streamlit's theme covers the base colours:
# .streamlit/config.toml
[theme]
primaryColor = "#6366f1"
backgroundColor = "#0e1117"
secondaryBackgroundColor = "#1a1d24"
textColor = "#fafafa"
Anything beyond that goes into one injected stylesheet:
def get_custom_css():
    return """
    <style>
    @import url('https://fonts.googleapis.com/css2?family=Inter:wght@400;600;700&display=swap');
    html, body, [class*="css"] { font-family: 'Inter', sans-serif; }
    .project-card {
        background: linear-gradient(135deg, #1a1d24 0%, #262b36 100%);
        border-radius: 12px; padding: 1.5rem; transition: transform .2s;
    }
    .project-card:hover { transform: translateY(-4px); }
    .tech-badge {
        background: linear-gradient(135deg, #6366f1 0%, #a855f7 100%);
        border-radius: 999px; padding: .2rem .7rem; font-size: .8rem;
    }
    </style>
    """

st.markdown(get_custom_css(), unsafe_allow_html=True)
6. Add animations
A Lottie file is a JSON description of a vector animation. Load it once and render it with st_lottie:
import json
from streamlit_lottie import st_lottie

def load_lottie_file(path):
    with open(path) as f:
        return json.load(f)

st_lottie(load_lottie_file("lottiefiles/coding-boy.json"), height=350, key="hero")
Give each st_lottie call a unique key, or Streamlit complains about duplicate elements.
7. A contact form without a backend
st.form groups inputs so the script only reruns when the visitor presses submit. clear_on_submit empties the
fields afterwards:
from datetime import datetime
import os

with st.form("contact_form", clear_on_submit=True):
    name = st.text_input("Name *")
    email = st.text_input("Email *")
    message = st.text_area("Message *", height=150)
    sent = st.form_submit_button("Send Message")

if sent:
    if not name or not email or not message:
        st.error("Please fill in all required fields.")
    elif "@" not in email or "." not in email:
        st.error("Please enter a valid email address.")
    else:
        os.makedirs("submissions", exist_ok=True)
        with open("submissions/contact_submissions.txt", "a", encoding="utf-8") as f:
            f.write(f"{datetime.now():%Y-%m-%d %H:%M:%S} | {name} <{email}>\n{message}\n{'=' * 40}\n")
        st.success("Thanks! I'll get back to you soon.")
This is perfect for a personal site. If you get a lot of messages, swap the file write for an email API or a
database. Keep submissions/ out of git, as the template's .gitignore does.
8. Docker: one image, two ways to run it
The Dockerfile builds a self-contained image. Dependencies are installed first, so editing your code doesn't
reinstall them on every build:
FROM python:3.12-slim
ENV PYTHONDONTWRITEBYTECODE=1 PYTHONUNBUFFERED=1
WORKDIR /usr/src/app

COPY requirements.txt ./requirements.txt
RUN pip install --no-cache-dir -r requirements.txt

COPY . .
EXPOSE 8501
ENTRYPOINT ["/usr/src/app/scripts/entrypoint.sh"]
scripts/entrypoint.sh just starts the app. exec replaces the shell, so Docker's stop signal reaches Streamlit
directly:
#!/bin/bash
exec streamlit run /usr/src/app/app.py
For editing, docker-compose.yml runs the same image but mounts your project over the copied code, so the
container always sees your latest files:
services:
  portfolio:
    image: portfolio:latest
    build: .
    volumes:
      - ./:/usr/src/app/
    ports:
      - "8081:8501"
    restart: unless-stopped
With runOnSave = true under [server] in .streamlit/config.toml, saving a file reloads the page in your
browser. There's no file-watcher script to maintain; Streamlit does it for you.
For deploying, build and run the image on its own, as in "Run it in five minutes" above. Keep private files out
of it with .dockerignore. The template excludes .git and any saved contact-form messages.
9. Put it online
- Streamlit Community Cloud: push to GitHub, connect the repo at share.streamlit.io, and pick
app.py. It's free for public repos. - Any container host: push the image from step 8 to a registry and run it on Cloud Run, ECS, Fly.io and similar.
- Your own machine: run it with Docker and publish it through a Cloudflare Tunnel, with no open ports.
Ideas to extend it
- Add a blog section that renders Markdown files from a
posts/folder. - Show GitHub stats by calling the GitHub API and caching the result with
@st.cache_data. - Use the skill scores already in
SKILLS(0–100) to draw radar or bar charts with Plotly, which is already inrequirements.txt. - Offer a light/dark toggle by swapping the CSS string based on a sidebar switch.
Connected
shares a topic with this projectSentinel Sidecar: a learning security layer for any HTTP service
A security sidecar you put in front of any HTTP service. OWASP rules and small ML models decide each request in about a millisecond, and an out-of-band LLM analyst turns what it learns into short-lived blocks.
Botly: a local RAG chatbot
A private chatbot that answers from your own PDFs. It runs entirely on your machine with Ollama, LangChain, FAISS and Streamlit, packaged in one Docker image.
Host a website from your own machine with Cloudflare Tunnel
Move your domain to Cloudflare, create a tunnel, and serve apps running on your own hardware without opening a single port.
AppSec scanner suite: six scanners, one interface
SAST, DAST, SCA, SBOM, CSPM and secret detection, each wrapping a proven open-source scanner behind the same command line, the same Docker packaging and the same JSON output.
CVE Trove: a vulnerability intelligence pipeline
Pulls 15 public vulnerability feeds on a schedule, merges them into one record per CVE, and streams the result into MongoDB through Celery workers.